Security Groups Guide
A practical, step-by-step walkthrough to create security groups, add rules, and manage them effectively. This guide complements the overview at Security Groups.
1) Create a Security Group
- Open the dashboard and go to Menu → Network → Security Groups.
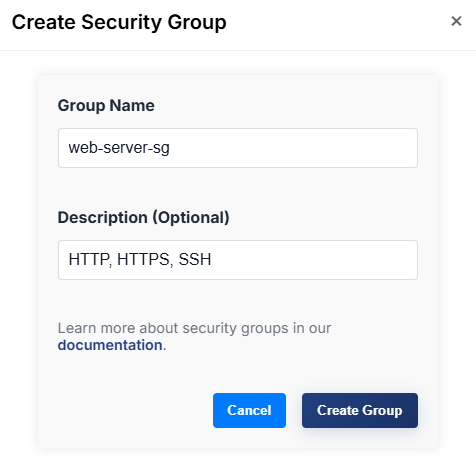
- Click "Create Group".
- Fill out the form:
- Group Name (e.g.,
web-frontend) - Description (optional), e.g.,
Allow HTTP/HTTPS/SSH
- Group Name (e.g.,
- Submit to create the group.
2) Add Rules to the Group
Use rules to allow specific traffic. In the UI, a single Port input is used (same min/max), and protocol is selected from a dropdown.
- From the Security Groups list (Menu → Network → Security Groups), choose Actions → "Manage Rules" on your group, or open the Rules page and select your group.
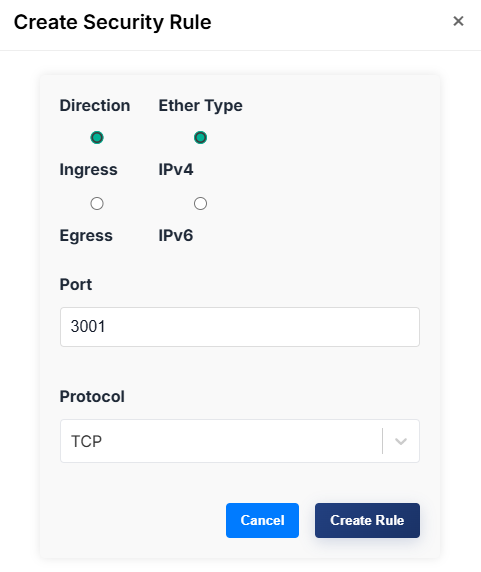
- Click "Create Rule".
- Configure:
- Direction:
ingress(inbound) oregress(outbound) - EtherType:
IPv4orIPv6 - Port: a single port number (1–65535)
- Protocol: choose
TCP,UDP, orTCP & UDP
- Direction:
- Submit.
Behavior note: Selecting "TCP & UDP" creates two rules (one for TCP and one for UDP) with the same port.
Common examples
- Allow SSH (IPv4): ingress, IPv4, port 22, TCP
- Allow HTTP (IPv4): ingress, IPv4, port 80, TCP
- Allow HTTPS (IPv4): ingress, IPv4, port 443, TCP
- Allow app port over TCP & UDP (e.g., 1194 for VPN): ingress, IPv4, port 1194, TCP & UDP
- Allow all outbound: egress, IPv4, port 1–65535 is not used in UI; instead add TCP (e.g., 1–65535 not supported as a single field). Recommended: add necessary egress ports explicitly or consult platform defaults.
3) Delete or Adjust Rules
- To delete, use Actions → Delete Rule on a rule entry.
- To change policies, remove outdated rules and re-create with desired parameters.

4) Attach Security Groups to Instances
- When creating or editing an instance, select one or more security groups.
- Rules take effect immediately on associated instances.

Tips
- Least privilege: open only the ports you need.
- For SSH access, ensure the instance is Public and allow TCP 22 from your IP range.
- Switch EtherType to IPv6 when targeting IPv6 traffic.
Troubleshooting
- Rule creation fails:
- Ensure Port is in the range 1–65535.
- If using TCP & UDP, the UI will create two rules; check both appear.
- Cannot connect to instance:
- Confirm the correct group is attached to the instance.
- Verify the rule direction (ingress for incoming connections).
- Check networking setup and that the instance has a public route if needed.
Related
- Security Groups Overview → About Security Groups
- Networking → About Networking
- Compute → Launch instances
- Storage → Persistent volumes